
No-Bake Keto Peanut Butter Fudge with Rich Cocoa Layer
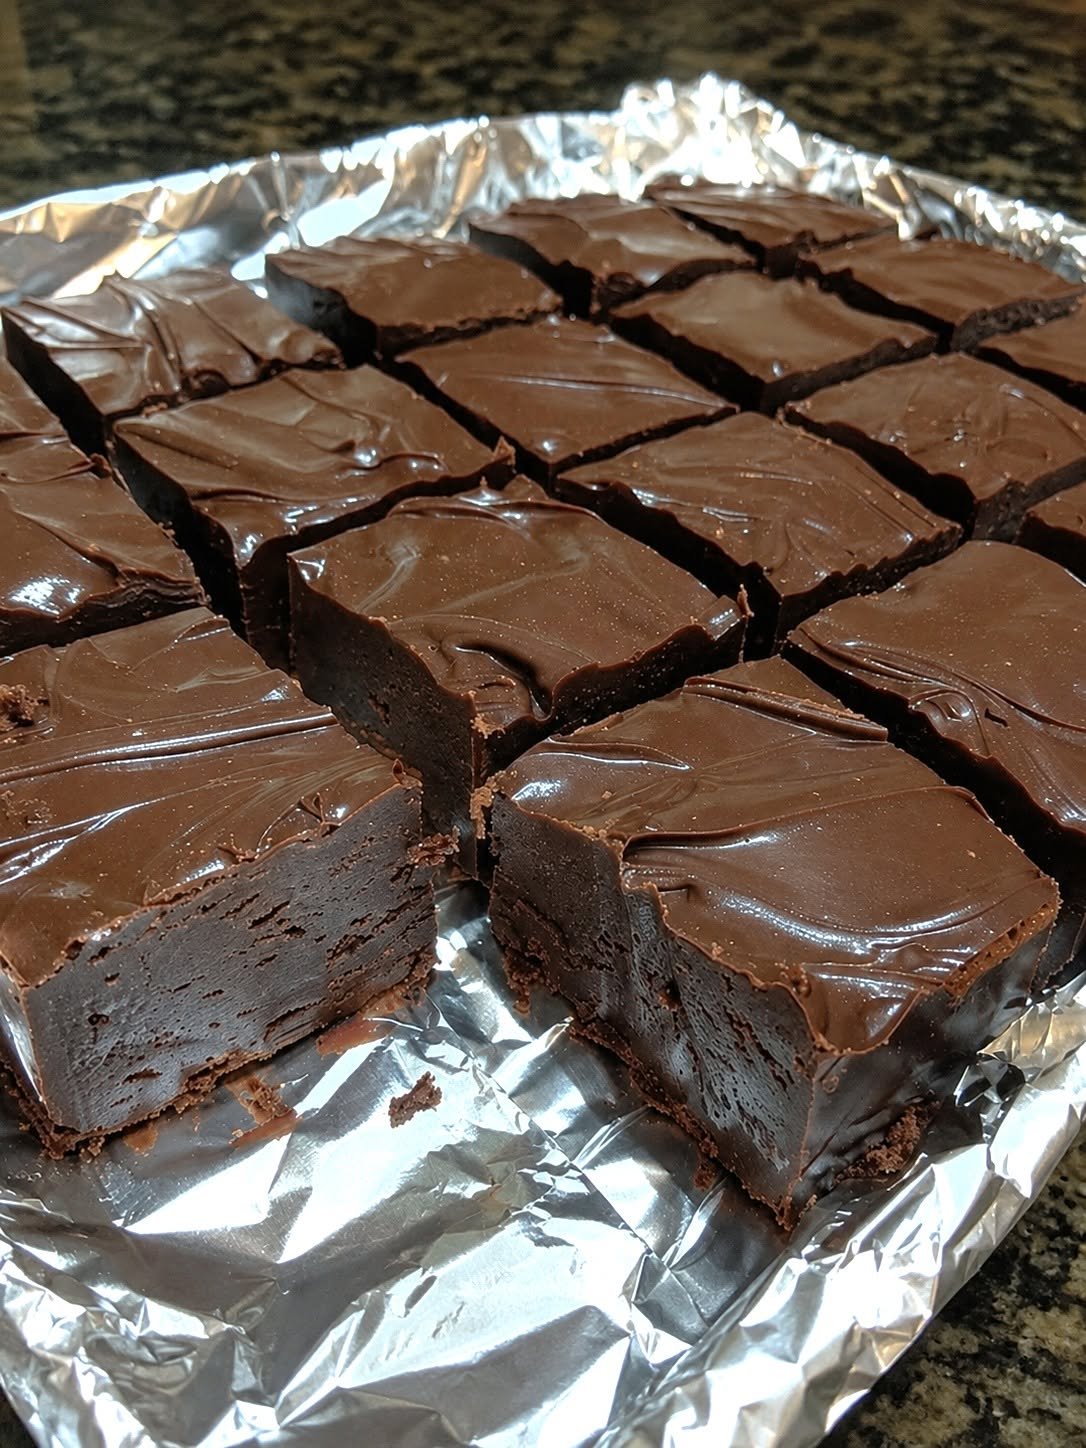
Rich, velvety cocoa meets creamy roasted peanut butter in this decadent no-bake fudge. Every bite melts on your tongue with a dense, melt-in-your-mouth texture that rivals traditional confectionery without the sugar spike. Loaded with healthy fats and fortified with quality protein powder, this treat satisfies stubborn sweet cravings while easily fitting into any strict low-carb or high protein routine.
Can This Keto Chocolate Peanut Butter Fudge Support Weight Loss Goals?
This recipe supports weight loss through sustained satiety rather than empty calories. The combination of slow-digesting dietary fats from coconut oil and natural peanut butter works alongside concentrated whey or casein protein to curb hunger hormones and blunt blood sugar spikes. Because it contains virtually zero added sugar and minimal net carbohydrates, it prevents energy crashes, helping you avoid between-meal snacking while remaining within a calorie-conscious deficit.
Does Keto Chocolate Peanut Butter Fudge Fit a High Protein Lifestyle?
Yes, this fudge is purposefully formulated to deliver a meaningful protein punch rarely found in traditional desserts. By folding high-grade low-carb protein powder directly into natural nut butter, each bite supplies essential amino acids alongside rich macronutrient density. With roughly 3 grams of net carbs per square, it complements ketogenic macros without compromising your daily protein intake targets. It serves as an efficient, nutrient-dense vehicle for clean, muscle-sparing nutrition.
My Personal Experience
-
Pre-portioned craving control: Keeping a pre-sliced batch in the freezer stopped my late-night sugar raids cold, giving me a rich dessert that feels like a cheat meal. Because the healthy fats are so dense, a single one-inch square kept me completely satisfied through entire evenings.
-
Effortless post-workout fuel: I swapped my usual chalky protein shake for two chilled squares alongside black coffee after morning strength sessions. The boost of fast-acting protein combined with sustained energy from the fats eliminated mid-morning brain fog.
-
Zero textural compromise: Most no-sugar fudges turn gritty or oily, but sifting the cocoa and protein powder created a silkiness indistinguishable from bakery fudge. Chilling the base layer before pouring the chocolate layer delivered sharp, clean aesthetic lines that looked professionally made.
Perfect For:
-
High Protein Snacks: A portable, nutrient-dense bite to keep energy steady between demanding work blocks.
-
Low-Carb Desserts: An after-dinner indulgence that cures chocolate cravings without kicking you out of ketosis.
-
Keto Diet Plans: A reliable high-fat, low-carb fat bomb that effortlessly boosts daily macro targets.
-
Post-Workout Recovery: A compact alternative to traditional protein shakes with quality amino acids.
Why You’ll Love This Recipe:
-
No-bake simplicity: The entire recipe comes together on the stovetop or microwave in under ten minutes using basic pantry items. You skip oven preheating entirely and let the freezer do all the heavy lifting to set the fudge.
-
Dual-layer flavor contrast: Balancing salty peanut butter beneath a layer of deep, unsweetened dark chocolate prevents palate fatigue. The contrast mimics a classic peanut butter cup, delivering rich indulgence without refined sugars.
-
Customizable macro balance: You can easily adjust the protein content by switching between whey, casein, or plant-based protein powders. The natural fats carry the sweetness of powdered erythritol smoothly without leaving an artificial aftertaste.
Common Mistakes to Avoid:
-
Using commercial sweetened peanut butter: Standard shelf-stable peanut butters contain hydrogenated oils and added sugar that spike carbs and prevent proper setting; use only natural, drippy peanut butter (peanuts and salt).
-
Overheating the chocolate layer: Applying excessive direct heat scorches cocoa powder and separates coconut oil into an unmixable oily slick; always melt over low, gentle heat.
-
Skipping powdered sweetener: Using granulated erythritol or allulose results in an unpleasant, crunchy texture; always grind your sweetener or use a commercially prepared confectioner’s blend.
-
Slicing at room temperature: Attempting to cut the fudge before it has completely solidified causes the layers to smudge and collapse; always slice directly out of the refrigerator with a warm, wiped knife.
Required Equipment:
-
8×8-inch baking pan: Provides the ideal depth for thick, uniform squares that set evenly.
-
Parchment paper: Prevents sticking and allows you to lift the entire block out cleanly for slicing.
-
Silicone spatula: Scrapes down bowl walls thoroughly so no protein powder or melted nut butter is wasted.
-
Fine-mesh sieve: Sifts powdered sweetener, cocoa, and protein powder to guarantee a silky, lump-free texture.
Storage Instructions:
Store your fudge squares in an airtight container lined with parchment paper inside the refrigerator for up to 2 weeks. Because coconut oil softens quickly at ambient temperatures, keep the squares chilled until immediately ready to serve. For extended preservation, freeze the squares in a single layer before transferring them to a heavy-duty freezer bag; they will retain full nutritional value, flavor, and texture for up to 3 months.
Recipe Details
-
Preparation Time: 10 minutes
-
Cooking Time: 2 minutes
-
Total Time: 12 minutes (plus 1 hour chilling time)
-
Servings: 16 squares
-
Best Season for This Recipe: All-season
-
Total Calories (Per Serving): Approximately 168 kcal
A decadent, dual-layer no-bake dessert engineered for fitness enthusiasts and keto dieters alike. Creamy, salted peanut butter fudge forms the base beneath a silky, antioxidant-rich dark chocolate cap. Packed with quality protein and wholesome fats, it satisfies deep dessert cravings in a single, macro-friendly square.
📝 Ingredients:
-
1 cup (250g) natural creamy peanut butter (Note: Ensure it is well-stirred with no added sugars or palm oil; only peanuts and salt).
-
1/3 cup (75g) refined coconut oil (Note: Use refined to avoid coconut flavor, or unrefined if you prefer a subtle coconut undertone).
-
2 scoops (60g) unflavored or vanilla whey protein isolate (Note: Whey/casein blends also work well and yield a slightly denser crumb).
-
1/3 cup (40g) powdered erythritol or allulose (Note: Adjust up by 1–2 tablespoons depending on desired sweetness level).
-
1/4 cup (25g) unsweetened Dutch-process cocoa powder (Note: Dutch-process yields a smoother, less acidic chocolate flavor).
-
1 tsp pure vanilla extract
-
1/4 tsp fine sea salt (Note: Omit if your peanut butter is heavily pre-salted).
-
Flaky sea salt (optional) (For finishing the chocolate top).
Directions:
-
Prep the pan: Line an 8×8-inch baking pan with parchment paper, leaving an overhang on the sides for easy removal later.
-
Melt the base: Add 3/4 cup of the peanut butter and 1/4 cup of the coconut oil into a heatproof bowl. Microwave in 20-second bursts at 50% power (or over low heat on the stovetop), stirring between bursts until completely liquefied and smooth (about 40–50 seconds total).
-
Incorporate protein: Sift the whey protein isolate, powdered sweetener, and sea salt into the warm peanut butter mixture. Stir vigorously with a silicone spatula until a thick, uniform dough forms with no visible powder streaks.
-
Press the base layer: Transfer the peanut butter mixture into the lined pan. Press it into a flat, even layer using the back of a measuring cup. Place the pan in the freezer for 15 minutes to firm up.
-
Prepare chocolate top: In a small saucepan over low heat (or microwave at 30% power), gently warm the remaining 1/4 cup peanut butter, remaining 2 tbsp coconut oil, cocoa powder, and vanilla extract. Whisk continuously for 1 to 2 minutes until glossy, fluid, and free of lumps.
-
Layer and set: Remove the pan from the freezer. Pour the warm chocolate mixture evenly over the firm peanut butter base, tilting the pan to coat edge-to-edge. Sprinkle lightly with flaky sea salt if desired.
-
Chill and slice: Return the pan to the freezer for 45 minutes (or refrigerator for 2 hours) until fully set firm to the touch. Lift the fudge out using the parchment overhang, place on a cutting board, and slice into 16 even squares using a sharp knife warmed under hot water and wiped dry.
Nutrition Facts (Per Serving – Approximate):
-
Calories: 168 kcal
-
Fats: 14g
-
Cholesterol: 5mg
-
Sodium: 95mg
-
Potassium: 140mg
-
Total Carbohydrates: 5g
-
Fiber: 2g
-
Net Carbs: 3g
-
Sugars: 1g
-
Protein: 7g
-
Calcium: 25mg
Notes:
-
Storage & Thawing: Keep stored strictly in cold storage; if eating from the freezer, let the square rest at room temperature for 3 minutes for the best silky bite.
-
Reheating: Do not reheat; this recipe relies on solid-state fats to retain its shape and will liquefy quickly with heat.
-
Allergy Variations: Swap peanut butter 1:1 with sunflower seed butter for a completely nut-free, school-safe alternative with nearly identical macros.
-
Flavor Enhancements: Stir a pinch of instant espresso powder into the melted chocolate layer to dramatically amplify the cocoa notes.
Frequently Asked Questions:
Can I use plant-based protein powder instead of whey?
Yes, but you may need to add an extra tablespoon of melted coconut oil because plant proteins absorb significantly more moisture than whey.
Why did my fudge turn out oily on top?
The nut butter or coconut oil separated due to overheating, which you can avoid by melting the mixture slowly on very low heat.
Can I leave this fudge out on a dessert table?
No, because coconut oil liquefies at 24°C (76°F), this fudge will soften and lose its shape if left out of the refrigerator for longer than 20 minutes.
What is the best sugar-free sweetener to use?
Powdered erythritol, monk fruit blends, or powdered allulose work best to prevent a gritty texture in the final set.
How do I get clean, non-crumbly cuts when slicing?
Run a large chef’s knife under hot tap water, wipe it completely dry with a towel, and slice through the chilled block in single, steady presses.