
Easy Low-Carb Coconut Custard: Rich, Creamy High-Protein Treat
Description:
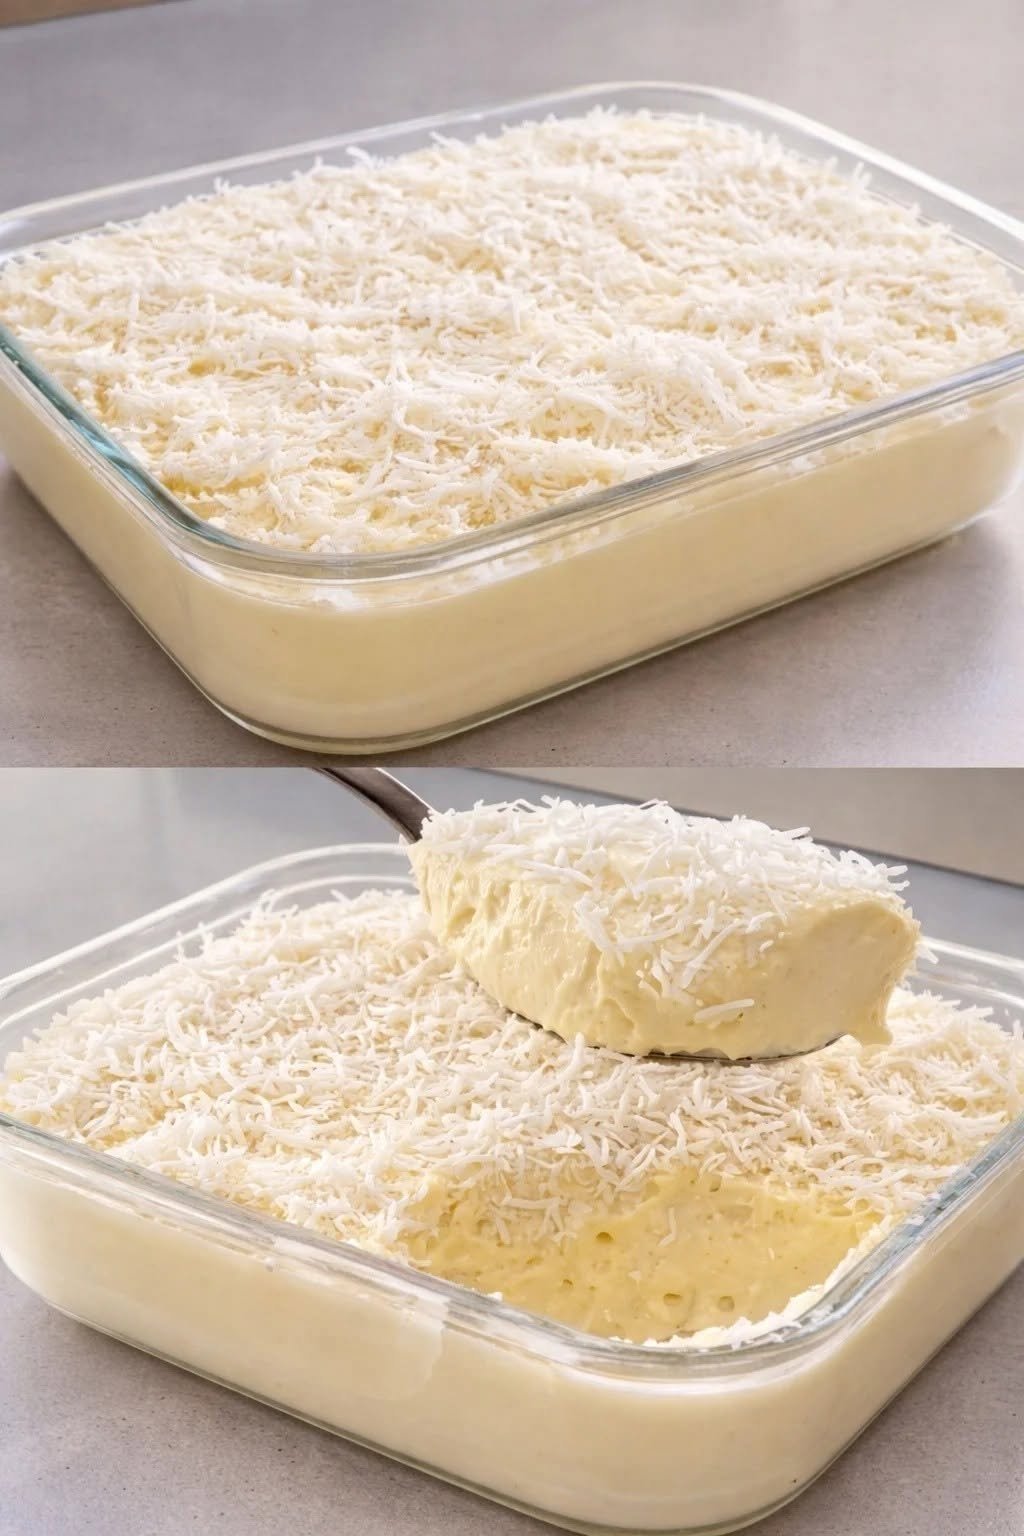
Indulge in a velvety, spoon-coating treat that pairs rich tropical coconut cream with a clean, satisfying sweetness. This recipe delivers a luxurious, melt-in-your-mouth texture while quietly operating as a low-carb, high-protein powerhouse that will not derail your daily macros. It bridges the gap between pure indulgence and smart nutrition, giving you all the decadence of traditional pudding without the sugar crash.
Can This Creamy Coconut Milk Dessert Support Weight Loss Goals?
Yes, because it relies on high-satiety ingredients that naturally help regulate appetite without spiking blood sugar. The combination of sustained whey protein and coconut-derived medium-chain triglycerides provides steady energy, curbs sugar cravings between meals, and spares lean muscle tissue while in a caloric deficit.
Does Creamy Coconut Milk Dessert Fit a High-Protein Lifestyle?
This dessert fits seamlessly into a high-protein regimen by delivering roughly 21g of quality protein per bowl alongside fewer than 4g of net carbs. Unsweetened full-fat coconut milk and pure vanilla extract form the rich base, while premium unflavored or vanilla whey isolate ramps up the amino acid profile without introducing hidden sugars. It acts as both a functional recovery snack and an everyday dessert without throwing off your macronutrient ratios.
My Personal Experience
-
Perfect Mid-Afternoon Fuel:
I reach for this when the 3 PM sugar craving strikes because it instantly kills sweet urges. The protein density keeps me completely full until dinner without that sluggish afternoon energy slump.
-
Flawless Powder Incorporation:
Whisking the whey isolate into cooled coconut milk prevented the gritty clumps I used to get when making high-protein sweets. The result was consistently as smooth and glossy as a high-end bakery custard.
-
Meal-Prep Simplicity:
Making four ramekins on Sunday saved my weeknights whenever I needed a quick post-workout treat. The texture actually improved after 24 hours in the fridge, setting into an even richer consistency.
Perfect For:
-
High-protein dessert cravings after dinner without breaking ketosis
-
Fast, grab-and-go high-protein breakfasts when paired with toasted nuts
-
Post-workout recovery fuel that delivers essential amino acids
-
Low-carb snack prep for strict keto diet plans and clean-eating routines
Why You’ll Love This Recipe:
-
Restaurant-Quality Texture:
Full-fat coconut milk creates an ultra-thick, velvety base that mimics heavy dairy cream puddings. Every spoonful delivers a dense, decadent bite without relying on cornstarch or refined sugars.
-
Effortless Macro Balancing:
Each single serving delivers over 20 grams of protein to hit your daily targets easily. It makes staying within strict low-carb boundaries feel like a genuine indulgence rather than dietary restriction.
-
No-Bake Kitchen Ease:
The entire dessert comes together in under ten minutes on the stovetop using basic pantry staples. You can chill it and have several days of portion-controlled desserts ready to go.
Common Mistakes to Avoid:
-
Overheating the Protein Powder: Boiling protein powder directly causes it to curdle, ruining the silky emulsion and leaving a grainy, chalky finish.
-
Using “Lite” Canned Coconut Milk: Watery, carton-style or lite coconut milks lack the necessary fat profile to set properly, resulting in a runny liquid rather than a custard.
-
Whisking Gelatin Directly into Hot Liquid: Pouring un-bloomed gelatin into a hot mixture leads to rubbery clumps that never fully dissolve.
-
Over-Sweetening Before Chilling: Sweetness dulls slightly when cold, but piling in artificial sweeteners early can leave an overwhelming bitter aftertaste once fully set.
Required Equipment:
-
Heavy-Bottomed Saucepan: Distributes heat evenly to gently warm the coconut milk without scorching the bottom.
-
Silicone Balloon Whisk: Blends the protein powder smoothly without scratching cookware or whipping excess air pockets.
-
Small Glass Ramekins: Provide neat, portion-controlled serving sizes that cool rapidly in the refrigerator.
-
Fine-Mesh Sieve: Catches any stray gelatin or protein flecks to guarantee an ultra-silky final custard.
Storage Instructions:
Pour the prepared dessert into airtight glass containers or cover individual ramekins tightly with plastic wrap pressed directly against the surface to prevent a skin from forming. Store in the refrigerator for up to 5 days; the high-protein emulsion will retain its stability and fresh taste throughout the week. Freezing is not recommended, as freezing breaks down the coconut fat emulsion and causes the protein base to separate into a watery texture upon thawing.
Recipe Details
-
Preparation Time: 5 minutes
-
Cooking Time: 6 minutes
-
Total Time: 11 minutes (plus 2 hours chill time)
-
Servings: 4
-
Best Season for This Recipe: All-season
-
Total Calories (Per Serving): ~285 kcal (approximate estimate)
A luscious, low-carb coconut custard whipped with premium protein for clean muscle fuel.
It combines silky full-fat coconut cream with a fragrant touch of warm vanilla bean.
Serve chilled for an effortless, guilt-free dessert that fits active macro targets.
📝 Ingredients
-
Full-fat canned coconut milk: 1 can (13.5 oz / 400 ml) (Use whole, unsweetened coconut milk, well shaken).
-
Unflavored or Vanilla Whey Protein Isolate: 2 scoops (60 g) (Whey isolate dissolves smoother than blends; adjust sweetener if vanilla is pre-sweetened).
-
Powdered Erythritol or Allulose: 3 tbsp (36 g) (Powdered form dissolves instantly without a crystalline crunch).
-
Powdered Unflavored Gelatin: 1.5 tsp (5 g) (Essential for a soft, set pudding texture).
-
Pure Vanilla Extract: 1 tsp (5 ml) (Rounds out the earthy coconut flavor).
-
Sea Salt: 1 pinch (approx. 0.5 g) (Sharpens overall sweetness and cuts the rich fat).
Directions
-
Bloom the Gelatin: Pour 2 tablespoons of cold water into a small bowl, sprinkle the gelatin evenly over the surface, and let sit undisturbed for 5 minutes until soft and spongy.
-
Warm the Base: Place the heavy-bottomed saucepan over medium-low heat; pour in the full-fat coconut milk, powdered sweetener, and sea salt, stirring gently for 3 to 4 minutes until the sweetener dissolves and small bubbles appear along the rim (do not boil).
-
Dissolve the Thickener: Remove the saucepan completely from the heat, drop in the bloomed gelatin, and whisk briskly for 60 seconds until the gelatin completely dissolves into the warm liquid.
-
Temper & Blend the Protein: Let the mixture cool for 5 minutes until warm rather than hot; vigorously whisk in the vanilla extract and protein powder one scoop at a time until completely smooth and free of visible flecks.
-
Strain and Portion: Pour the mixture through a fine-mesh sieve directly into 4 small ramekins to catch any undissolved particles.
-
Chill to Set: Transfer the ramekins to the refrigerator uncovered for 2 hours (or until set with a gentle wobble), then cover and keep cold until ready to eat.
Nutrition Facts (Per Serving – Approximate)
-
Calories: 285 kcal
-
Fats: 23 g
-
Cholesterol: 15 mg
-
Sodium: 95 mg
-
Potassium: 230 mg
-
Total Carbohydrates: 5 g
-
Fiber: 1.5 g
-
Net Carbs: 3.5 g
-
Sugars: 1.5 g
-
Protein: 21 g
-
Calcium: 55 mg
Notes:
-
Storage: Keep sealed in the fridge for up to 5 days; press parchment or cling film directly to the surface to keep the top layer creamy.
-
Reheating: This is designed as a chilled set pudding; do not microwave or reheat, as the gelatin will melt back into a thin liquid.
-
Allergy Adaptations: If sensitive to dairy, replace whey isolate with an unsweetened pea or brown rice protein isolate (add 1–2 extra tablespoons of unsweetened almond milk to offset plant powder thickness).
-
Flavor Boosts: Stir in 1/4 teaspoon of ground cinnamon, a drop of coconut extract, or top with toasted unsweetened coconut flakes just before serving for added crunch.