
Sugar-Free Keto Condensed Milk Recipe (Low-Carb, High-Protein)
Description
Rich, velvety, and naturally sweet, this homemade keto condensed milk delivers the nostalgic, thick texture of traditional canned milk without the sugar crash. Gently simmered cream paired with zero-calorie sweetener and clean protein creates a luscious base that transforms everyday low-carb baking. Whether you want to upgrade your morning coffee or whip up decadent high-protein snacks, this versatile staple delivers all the indulgence of classic confections while fitting seamlessly into a mindful, low-carb lifestyle.
Can This Keto Condensed Milk Support Weight Loss Goals?
This recipe supports weight loss goals by eliminating refined sugars and replacing high-fructose syrups with healthy fats and lean protein. Traditional sweetened condensed milk packs over 20 grams of fast-acting sugar per tablespoon, causing sharp insulin spikes that can trigger hunger and fat storage. By relying on slow-digesting healthy dairy fats, a sugar-free sweetener, and pure protein powder, this recipe promotes sustained satiety, keeps blood glucose levels stable, and satisfies intense sweet cravings without excess empty calories.
Does Keto Condensed Milk Fit a High-Protein Lifestyle?
Yes, this recipe integrates seamlessly into a high-protein lifestyle because it swaps the empty, carb-laden profile of standard condensed milk for concentrated nutrition. By whisking in high-quality unflavored whey protein isolate alongside rich heavy cream and allulose, each serving provides meaningful protein while keeping net carbs around 1 gram. The quality dairy proteins help support daily amino acid intake and lean muscle recovery, making it an ideal sweet builder for fitness-minded meal plans.
My Personal Experience
-
Game-Changer for Low-Carb Desserts:
Whisking this into low-carb fudge and no-churn protein ice creams provided the exact glossy body standard condensed milk offers without crystallizing.
-
Flawless Coffee Sweetener:
Stirring two tablespoons directly into a hot morning espresso created an instant, protein-boosted Vietnamese-style iced latte that curbed midday snacking.
-
Silky Protein Integration:
Dissolving the whey protein powder off the heat prevented clumping, yielding a glossy, perfectly uniform reduction that never separated.
Perfect For:
-
High-Protein Breakfasts: Drizzle over protein pancakes, keto waffles, or chia seed pudding for a rich morning treat.
-
High-Protein Desserts: Use as the primary base for low-carb cheesecakes, keto fudge, key lime pies, and protein truffles.
-
High-Protein Snacks: Blend directly into Greek yogurt bowls or spoon over roasted nuts for quick satiety between meals.
-
Keto Diet Plans: An essential pantry alternative to store-bought canned milk for strict keto and low-carb baking.
Why You’ll Love This Recipe:
-
Thick, Glossy Consistency:
Gentle reduction creates a clingy, rich texture that replicates canned carnation milk perfectly without gums or fillers.
-
Balanced Sweetness Without the Aftertaste:
Using allulose produces authentic caramelization and clean sweetness without the bitter cooling sensation of erythritol.
-
Protein-Enhanced Base:
Infused with pure whey isolate to give treats an extra nutritional lift that keeps you full and energized.
Common Mistakes to Avoid:
-
Boiling over High Heat: Rapid boiling scorches the heavy cream and sweetener at the bottom, creating a burnt aftertaste and curdled fat.
-
Adding Protein Powder Directly to Boiling Liquid: Dumping whey protein into simmering hot liquid causes it to denature instantly, leaving tough, grainy white lumps.
-
Using Granulated Erythritol: Erythritol recrystallizes once chilled, causing your smooth condensed milk to turn crunchy and chalky.
-
Over-Reducing on the Stove: The mixture thickens significantly as it cools; pulling it off the flame when it coats the back of a spoon prevents it from turning into stiff toffee in the fridge.
Required Equipment:
-
Heavy-Bottomed Saucepan: Distributes heat evenly across the base, preventing dairy fats and sweeteners from scorching.
-
Silicone Spatula or Whisk: Glides along the corners of the pan to continuously scrape down milk solids and maintain a uniform blend.
-
Fine-Mesh Sieve: Strains out any stray coagulated protein bits to guarantee a glass-smooth finish.
-
Airtight Glass Jar (e.g., Mason Jar): Keeps the reduction airtight to lock in moisture and prevent refrigerator odor absorption.
Storage Instructions:
-
Refrigerator: Pour the cooled milk into a sterilized glass Mason jar with an airtight lid and refrigerate for up to 10 days. The fats and protein will firm up slightly; simply stir or briefly warm before use.
-
Freezer: Freeze in silicone ice cube trays or a freezer-safe glass jar for up to 3 months. Thaw individual portions overnight in the refrigerator, then whisk vigorously to restore its glossy consistency.
Recipe Details
-
Preparation Time: 5 minutes
-
Cooking Time: 25 minutes
-
Total Time: 30 minutes
-
Servings: 12 servings (2 tablespoons / 30 ml per serving)
-
Best Season for This Recipe: All-season
-
Total Calories (Per Serving): ~95 kcal (approximate estimate)
A luscious, slow-simmered alternative to canned condensed milk made with rich heavy cream and allulose.
Infused with unflavored whey isolate to deliver authentic dessert richness along with clean protein.
Thickens to a glossy, pourable ribbon that elevates keto treats, coffee drinks, and low-carb meal preps.
📝 Ingredients:
-
2 cups (480 ml) Heavy whipping cream
-
4 tbsp (56 g) Unsalted butter
-
⅓ cup (64 g) Powdered allulose (Note: Allulose melts smoothly and caramelizes without recooling crystals; powdered monk fruit-allulose blend works as a substitute)
-
⅓ cup (30 g) Unflavored whey protein isolate (Note: Ensure it is 100% pure unflavored isolate for clean blending without chalkiness)
-
1 pinch (approx. ⅛ tsp) Fine sea salt
-
½ tsp (2.5 ml) Pure vanilla extract
Directions:
-
Melt the Base (Medium-Low Heat | 3–4 minutes):
In a medium, heavy-bottomed saucepan over medium-low heat, combine the heavy whipping cream, unsalted butter, powdered allulose, and sea salt. Stir continuously with a silicone spatula until the butter is completely melted and the sweetener has dissolved into a smooth, bubbling liquid.
-
Simmer and Reduce (Low Heat | 18–20 minutes):
Reduce the heat to low so the cream maintains a gentle, lazy simmer with small bubbles along the rim. Whisk frequently, scraping down the sides and base of the pan to prevent milk solids from catching. Simmer until the liquid has reduced by roughly one-third, turns a pale golden-ivory shade, and coats the back of a spoon.
-
Temper and Whisk Protein (Off Heat | 3 minutes):
Remove the saucepan completely from the heat source and let the mixture rest for 2 minutes to cool slightly. Ladle roughly ¼ cup of the warm reduced cream into a small bowl containing the unflavored whey protein isolate; whisk briskly until a smooth, lump-free slurry forms. Pour this tempered mixture back into the warm saucepan along with the vanilla extract, whisking continuously until glossy and homogenous. (High-protein cooking tip: Tempering the protein off the heat prevents thermal shock, keeping the whey from denaturing into gritty clumps).
-
Cool and Set (Room Temperature to Chill | 30 minutes):
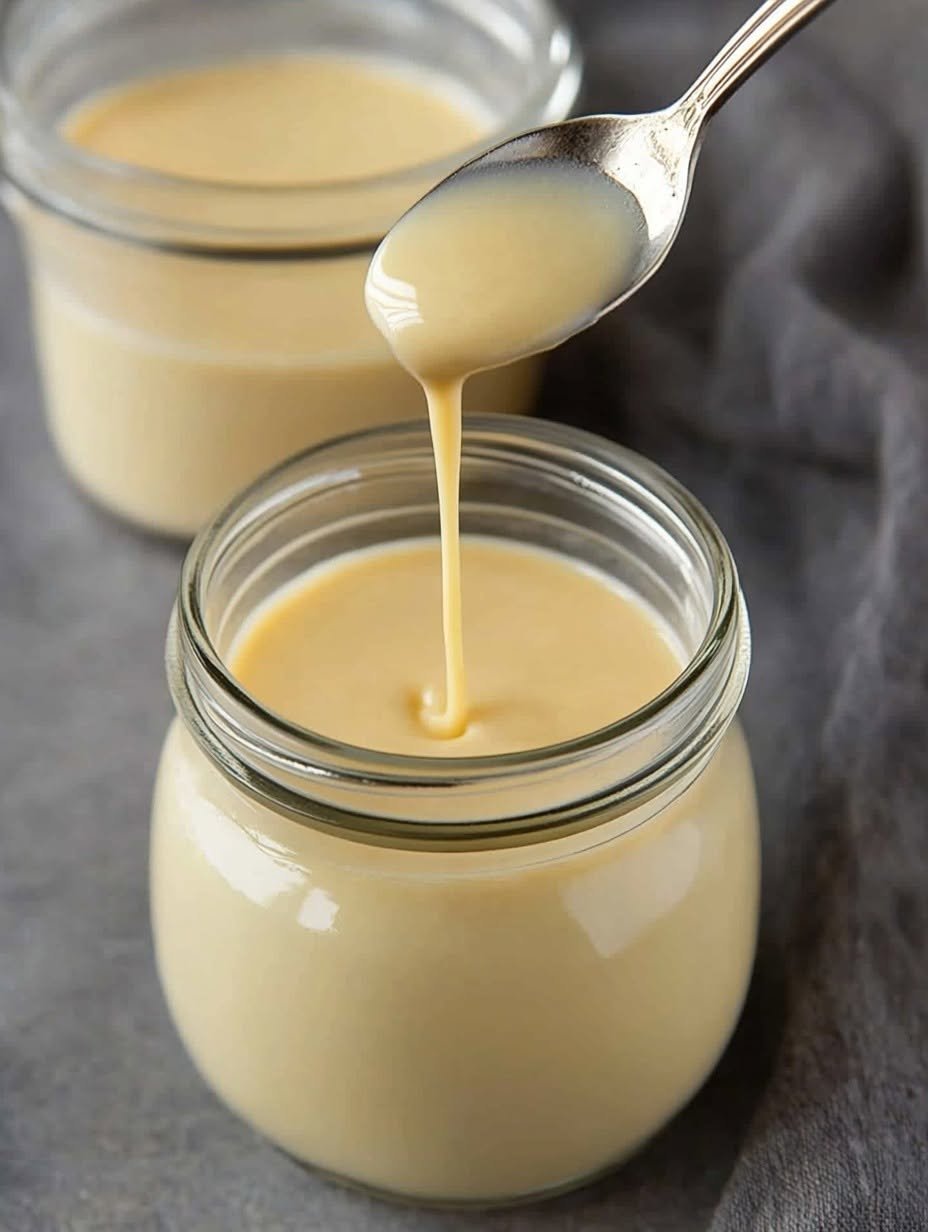
Pour the mixture through a fine-mesh sieve directly into a clean glass jar to catch any small stray particles. Allow it to sit uncovered at room temperature for 25–30 minutes to cool; it will transform from a pourable liquid into a thick, ribbon-like consistency matching classic condensed milk. Seal tightly and store in the refrigerator.
Nutrition Facts (Per Serving – Approximate):
-
Calories: 95 kcal
-
Fats: 9.5 g
-
Cholesterol: 32 mg
-
Sodium: 45 mg
-
Potassium: 35 mg
-
Total Carbohydrates: 6.5 g
-
Fiber: 0 g
-
Net Carbs: 0.8 g (excluding non-metabolized allulose)
-
Sugars: 0.8 g (naturally occurring dairy sugars)
-
Protein: 2.5 g
-
Calcium: 35 mg
Notes:
-
Storage Tips: Store refrigerated in an airtight glass jar for up to 10 days; if separation occurs over time, shake or whisk vigorously for 15 seconds.
-
Reheating Instructions: Microwave an individual portion for 5–8 seconds, or place the sealed jar in a warm water bath to loosen the texture without melting the dairy fats completely.
-
Allergy Notes: Contains dairy (milk, butter, whey isolate). For a dairy-free variation, substitute heavy cream with full-fat canned coconut milk, vegan butter, and an unflavored pea/almond protein powder.
-
Flavor Boosts: Whisk in a pinch of ground cinnamon, a drop of maple extract, or a tablespoon of unsweetened cocoa powder during step 3 for flavored dessert fillings.