 ByYara
High Protein Homemade Chicken Bone Broth – Pressure Canning Recipe
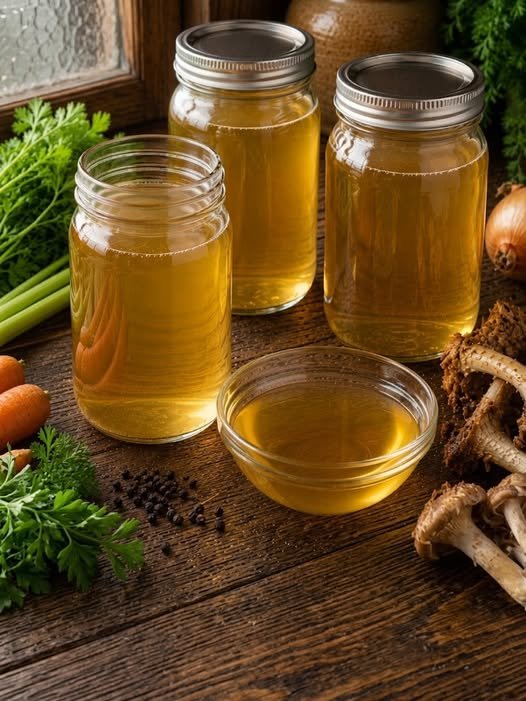
Description
There’s something truly special about opening a jar of golden, homemade chicken broth that you preserved yourself. This pressure canning recipe transforms simple chicken bones and vegetables into a rich, flavorful liquid gold that’s infinitely better than anything from a carton. The slow simmering extracts deep chicken flavor and natural collagen from the bones, creating a broth with a silky mouthfeel that’s both nourishing and satisfying. Perfect for sipping on a cold day or as the foundation for your favorite soups and stews, this recipe puts the power of wholesome, high-protein, low-carb cooking right in your pantry.
Can This Canned Chicken Broth Support Weight Loss Goals?
Absolutely. This broth is naturally low in calories while being rich in protein and minerals, making it an excellent tool for weight management. The protein content, particularly from collagen and gelatin extracted from the bones, can help promote satiety and reduce cravings . When used as a base for meals or enjoyed as a warm beverage, it provides a satisfying, nutrient-dense option that aligns perfectly with a calorie-conscious eating plan without sacrificing flavor or nutrition.
Does Canned Chicken Broth Fit a High Protein Lifestyle?
Yes, this homemade chicken broth is an exceptional fit for a high-protein lifestyle. With nearly zero carbohydrates and a significant protein content derived from the chicken bones and connective tissues, it seamlessly integrates into keto diet plans and other low-carb eating approaches . The slow simmering process extracts gelatin and collagen, providing a natural protein source that supports muscle maintenance and overall wellness, making it ideal for high protein breakfast routines or as a base for high protein snacks.
My Personal Experience
-
Effortless Meal Prep: After a busy weekend of canning, I have a pantry stocked with ready-to-use broth. This makes throwing together a high-protein soup or stew on a weeknight incredibly fast, saving me from reaching for store-bought alternatives.
-
Flavor That Transforms Dishes: The depth of flavor from homemade broth is unparalleled. When I use this in recipes, I notice a richer, more complex taste that elevates simple ingredients into something special, reinforcing why I choose homemade.
-
Confidence in Ingredients: Knowing exactly what went into my broth—fresh vegetables, quality bones, and no preservatives—gives me peace of mind. I can control the sodium and ensure it aligns with my low-carb dietary preferences without any hidden additives.
Perfect For
-
Keto Diet Plans: With virtually zero net carbs, this broth is a keto dieter’s best friend, providing hydration and electrolytes without impacting carb limits.
-
High Protein Breakfast: Start your day with a warm cup of savory broth instead of coffee for a nourishing, high-protein boost.
-
High Protein Snacks: Sip on a mug of broth between meals to curb hunger and increase your daily protein intake.
-
Low Carb Recipes: Use this as a base for soups, sauces, and stews to add flavor without adding unnecessary carbohydrates.
-
High Protein Desserts: While less common, savory broth can even be used in small amounts to balance flavors in some desserts, though it shines brightest in savory applications.
Why You’ll Love This Recipe
-
Shelf-Stable Convenience: Having jars of homemade broth on your pantry shelf means you’re always minutes away from a delicious meal. No more last-minute trips to the store or dealing with bulky cartons in the fridge.
-
Superior Flavor and Nutrition: The long simmering process extracts far more flavor and nutrients from the bones than store-bought versions. You get a richer taste and a better source of collagen and minerals .
-
Economical and Waste-Free: This recipe encourages using kitchen scraps like vegetable peels and leftover chicken bones. It’s a fantastic way to reduce food waste while creating a premium product at a fraction of the cost.
-
Complete Ingredient Control: You decide exactly what goes into your broth. Skip the salt, add your favorite herbs, or make it extra rich—tailor it perfectly to your dietary needs and taste preferences.
Common Mistakes to Avoid
-
Not Venting the Pressure Canner: Forgetting to vent steam for 10 minutes before adding the weight can trap air in the canner, leading to improper pressure and unsafe processing .
-
Incorrect Headspace: Leaving less than the recommended 1-inch headspace can cause jars to siphon liquid and fail to seal properly during processing .
-
Using the Wrong Pressure for Altitude: Failing to adjust the processing pressure for your elevation is a critical safety mistake. Always check your altitude and use the appropriate pounds of pressure .
-
Rushing the Cool-Down: Forcing the canner to cool down quickly by running water over it or opening the vent can cause jars to break and prevent proper sealing. Allow the canner to depressurize naturally .
Required Equipment
-
Pressure Canner: Essential for safely processing low-acid foods like broth. It reaches the high temperatures needed to destroy harmful bacteria .
-
Canning Jars with Lids and Bands: Use standard mason jars (pints or quarts) to hold your finished product. The two-piece lid system creates a vacuum seal as the jars cool .
-
Jar Lifter: Safely removes hot jars from the boiling water of the pressure canner without burning your hands or risking breakage .
-
Canning Funnel: Makes filling jars mess-free and helps maintain the correct headspace by directing the broth precisely where it needs to go .
Storage Instructions
-
Refrigerator: Once a jar is opened, store any leftover broth in the refrigerator and use within 3-4 days.
-
Freezer: For long-term storage, you can freeze broth in freezer-safe containers for up to 3 months. Leave about 1-inch headspace for expansion.
-
Pantry: Properly processed and sealed jars can be stored in a cool, dark pantry for up to one year, maintaining their high-protein quality . Remember to remove the metal bands before long-term storage to detect any seal failure easily.
Recipe Details
-
Preparation Time: 30 minutes
-
Cooking Time: 2-3 hours (for broth) + Pressure canning time (20 min for pints, 25 min for quarts)
-
Total Time: Approximately 4 hours
-
Servings: Makes about 8 pints or 4 quarts
-
Best Season for This Recipe: All-season – enjoy the warmth in winter and the convenience year-round.
-
Total Calories (Per Serving): Approximately 40-50 calories per 1 cup serving (based on skimmed broth) . This is an approximate estimate and can vary based on ingredients.
This recipe yields a versatile, flavorful broth that’s perfect for sipping or cooking. Use it as a base for soups, stews, or sauces to add a depth of flavor that only homemade can provide.
📝 Ingredients:
-
1 whole chicken carcass from a 4-5 lb roasted chicken, with most meat removed
-
2 large carrots, coarsely chopped
-
2 celery stalks, coarsely chopped
-
1 large onion, quartered (skins can be left on for color)
-
2 cloves garlic, smashed
-
2 bay leaves
-
1 tablespoon apple cider vinegar – helps extract minerals from the bones
-
1 tablespoon salt (or to taste)
-
2 quarts (8 cups) water, or enough to cover ingredients
Note: You can also use saved vegetable scraps (peelings, celery ends, onion skins) to enhance flavor and reduce waste .
Directions:
-
Make the Broth: In a large stockpot, combine the chicken carcass, carrots, celery, onion, garlic, bay leaves, vinegar, salt, and water. Bring to a rolling boil over high heat .
-
Simmer for Flavor: Reduce the heat to low and let it simmer gently for 2-3 hours. The broth is ready when it’s flavorful and slightly reduced. Skim off any foam that rises to the surface periodically .
-
Strain and Skim: Remove the pot from heat. Using a fine-mesh strainer or cheesecloth, strain the broth into a large bowl or another pot, discarding the solids. Let the broth cool slightly, then skim off the fat that rises to the top for a clearer broth .
-
Reheat and Prepare Jars: Return the strained broth to a boil. Meanwhile, warm your clean canning jars in a simmering water bath and prepare your pressure canner according to the manufacturer’s instructions .
-
Fill the Jars: Using a ladle and funnel, pour the hot broth into the warm jars, leaving 1 inch of headspace at the top. Wipe the rims with a clean, damp cloth to remove any residue .
-
Seal the Jars: Center a new lid on each jar and screw on the band until it is fingertip-tight (just snug, not overly tight) .
-
Pressure Can: Place the filled jars in the pressure canner. Following your canner’s manual, vent steam for 10 minutes, then bring to the correct pressure for your altitude (10 lbs for weighted gauge at sea level) .
-
Process: Process pint jars for 20 minutes and quart jars for 25 minutes, maintaining steady pressure .
-
Cool and Store: Once processing is complete, turn off the heat and let the canner cool and depressurize naturally. Remove the jars and let them cool undisturbed on a towel for 12-24 hours. Check the seals, label, and store in a cool, dark place .
Nutrition Facts (Per Serving – Approximate):
-
Calories: 41 kcal
-
Fats: 1g
-
Cholesterol: Varies
-
Sodium: Varies with salt added
-
Potassium: Varies
-
Total Carbohydrates: 1g
-
Fiber: 0g
-
Net Carbs: 1g
-
Sugars: 0g
-
Protein: 7g
-
Calcium: Varies
Notes
-
Storage: Store sealed jars without the bands to easily detect if a seal has been broken. Use within one year for best quality .
-
Reheating: Simply pour the broth into a pot and heat on the stovetop, or microwave in a mug for a quick, warming drink.
-
Allergy Notes: This recipe is naturally gluten-free, dairy-free, and nut-free. Always check that your seasonings are free from cross-contaminants.
-
Flavor Boosts: Add fresh herbs like thyme, parsley, or rosemary during the simmering process for a more complex flavor profile .
Frequently Asked Questions
1. Why do I need a pressure canner for chicken broth?
Chicken broth is a low-acid food that must be processed in a pressure canner to reach a high enough temperature to destroy harmful bacteria and spores, making it shelf-stable .
2. What is the correct processing time for canning broth?
Pint jars should be processed for 20 minutes, and quart jars for 25 minutes, once the pressure canner reaches the correct pressure for your altitude .
3. Why did my jars not seal?
Common reasons include not wiping the rims clean before adding lids, leaving incorrect headspace, or not tightening bands to fingertip tightness .
4. Can I use a rotisserie chicken carcass for this recipe?
Absolutely! A rotisserie chicken carcass works wonderfully and adds great flavor to your homemade broth .
5. How do I adjust the pressure for my altitude?
For a weighted-gauge canner, use 10 lbs of pressure from 0-1,000 ft and 15 lbs above that. For a dial-gauge canner, adjust pressure according to the specific altitude chart .
6. How long will the canned broth last?
Properly sealed and stored in a cool, dark pantry, your canned chicken broth will maintain its best quality for up to one year .